The scope of this tutorial is to introduce the CUBRID capabilities for database backup & restore.
The tutorial is split into two parts:
- Part I: Backup
- Part II: RestoreCUBRID Admin GUI client interface.
Overview
One of the main responsibilities of a database administrator is to perform regular backups of the database so that it can be restored successfully to a previous state in case of any incidents/system failures.
In particular, a CUBRID database backup is the procedure of creating and storing database volumes, control files, log files. It is typically executed using the cubrid backupdb utility in the command line or through the CUBRID Admin GUI client interface.
Note: When we talk about backup and restore, we need to mention that the restore environment must have the same operating system and the same version of CUBRID as the backup environment.
For migration purposes, there is another dedicated tool called the CUBRID Migration Toolkit (CMT), which supports such scenarios.
CUBRID backupdb utility
The syntax of the tool is:
cubrid backupdb [ options ] database_name
[ options ]
-D | -r | -l | -o | -S | -C | -t | -z | -e |
--destination-path | --remove-archive | --level | --output-file | --SA-mode | --CS-mode | --thread-count | --compress | --except-active-log | --no-check
For complete information about the usage of this utility, please consult the online manual at https://www.cubrid.org/manual/en/10.2/admin/admin_utils.html#backupdb or the offline help available within the CUBRID Admin client.
Note: The backupdb utility can only be executed by a user having backup authorization granted (e.g., dba).
Backup levels
The key to understand and develop a successful backup strategy is to understand first the CUBRID backup levels concept.
CUBRID supports the following three types of backups:
- Full backup (backup level 0). Backup level 0 is a backup that includes all database data.
- First incremental backup (backup level 1). Backup level 1 is an incremental backup that only saves the changes made since the level 0 full backup.
- Second incremental backup (backup level 2). Backup level 2 is an incremental backup that only saves data that has been changed since the first incremental backup.
In other words, the usual strategy to implement a database backup would be to:
- First, create a full database backup – level 0.
- Depending on the databases’ activity/the specifics of your installation, proceed next with level 1 incremental backups on a regular basis.
- Perform level 2 backups “between” the level 1 backups, based on your needs to ensure data availability, and taking into account the risks of losing data.
- Repeat the previous steps, whenever the differences between the backup levels become too big and will impact the performance/the size of the levels 1 or 2.
For example, a backup strategy could be:
- Perform level 0 backups every week
- Perform level 1 backups twice a week
- Perform level 2 backups every day
Of course, there are no absolute rules, and you will have to adapt the backup strategy to best fit the specifics of your CUBRID installation.
Backup examples
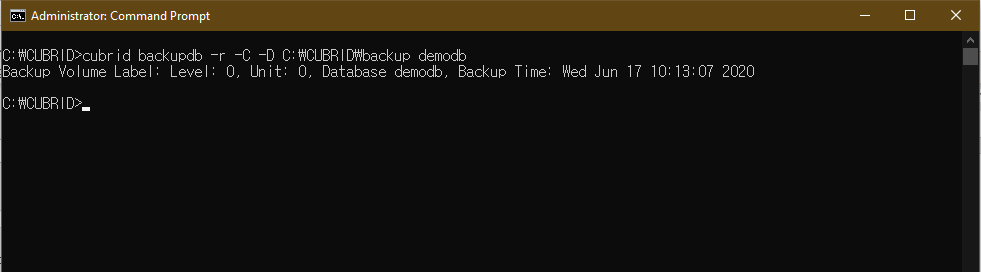
Let’s use the demodb database, and let’s create a full backup (level 0) of the database in client-server mode – we do not want to close the existing client connections. We will create the backup in a CUBRID installation subfolder – named “backup.” We will use the “–r” parameter because it is recommended (when performing a full backup) to remove the archive logs. For the other parameters, we will go with the default options:
cubrid backupdb –r –C -D C:\CUBRID\backup demodb
|
-D |
Specifies the directory path name (or device name) where backup volumes are to be created. |
|
-r |
Removes unnecessary archive logs after the backup is complete. |
|
-C |
Performs a backup in client/server mode. The default value is the one specified by the system parameter CUBRID_MODE. |
Note: In case a backup already exists for the level 0, the user will be prompted to confirm to overwrite it.
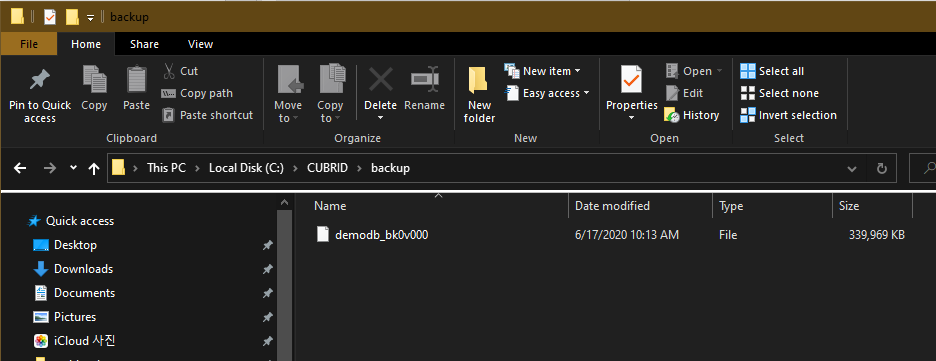
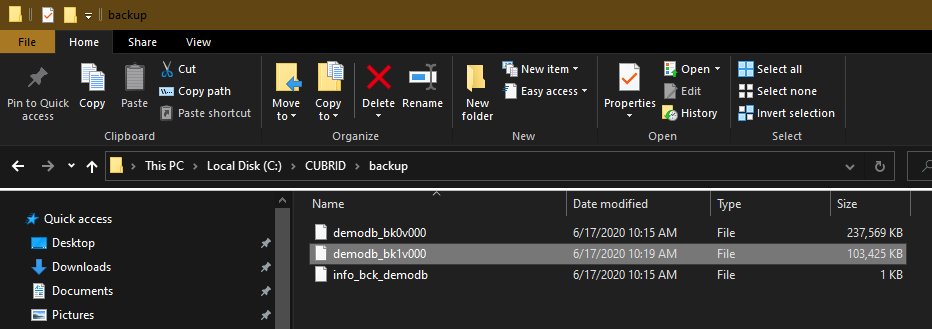
Notice that the default naming convention is used for the created backup files:
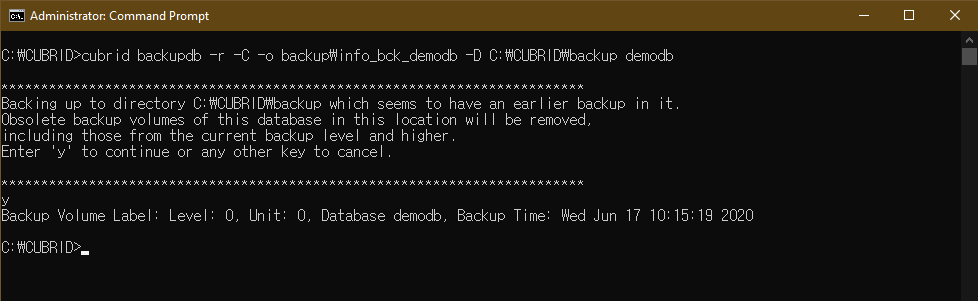
If we want to have more information about the backup, we can use the “-o” option to output the logs to the file; remember, when you use the “-o” option, the path you specify for the file where backup information will be dumped is relative to the CUBRID installation folder:
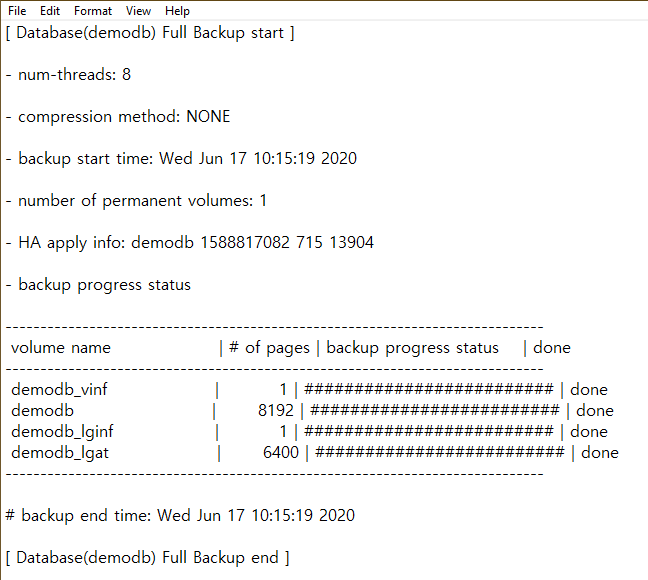
And here is the information which is stored in the specified file:
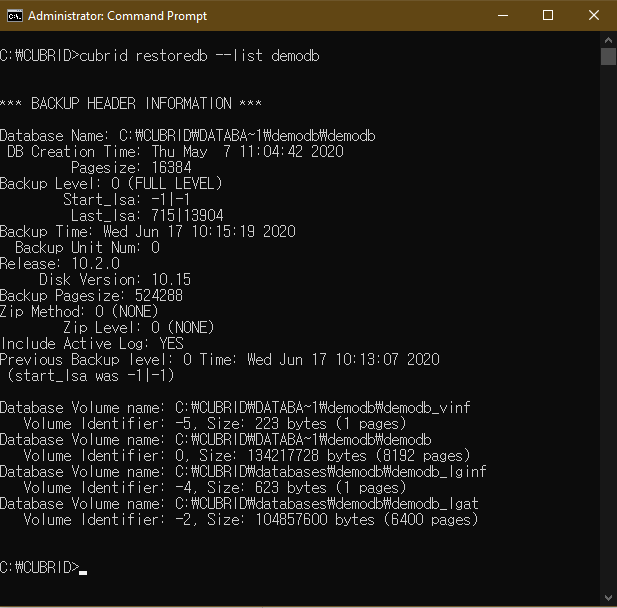
Tip: Remember, you can always see the list of the available database backups using the restoredb utility:
cubrid restoredb --list demodb
Once we have created a full backup of the database, we can proceed further with creating a level 1 backup:
cubrid backupdb –1 –r –C -D C:\CUBRID\backup demodb

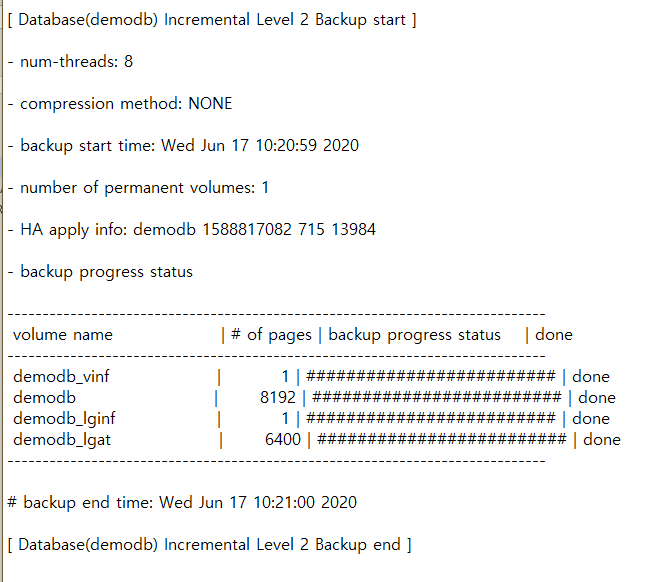
And once having a level 1 backup in place, we can now finally create level 2 backups. They can be created whenever needed, there is not required to re-create a level 1 backup every time before:

As you can see from the above examples, making a CUBRID database backup is very easy. The process itself consists of just running a single command and it executes very fast.
There are multiple options you can use with the tool to facilitate obtaining the results you need.
Backup database using CUBRID Admin Client
In the previous examples, we showed you how to create various backups using the command line tool (backupdb). But in addition to this solution, there is another easy way to create database backups – which is using the graphical interface provided by the CUBRID Admin client.
To backup a database using the CUBRID Admin client, use one of the following ways:
- Click the Backup Database
 icon from the toolbar
 - Right-click the database in the tree and then select the Backup Database item
- Select Action -> Backup Database from the main menu
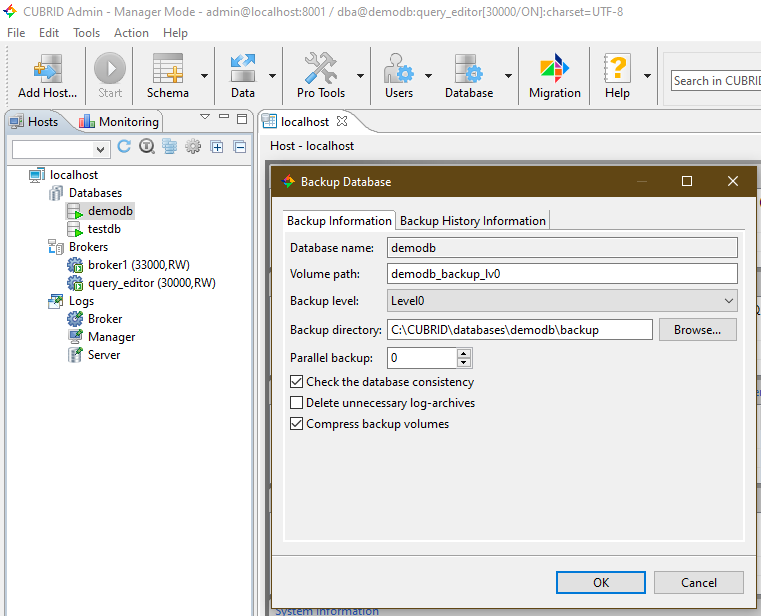
Once you select Backup Database the following dialog will be displayed, where you can specify the backup options
If a backup has been successfully created for the database, you can check the backup history from the Backup History Information tab, in the dialog above:

Backup Automation in the CUBRID Admin Client
Not only can you easily create backup from the interface, but also you can schedule automatic backups using the CUBRID Admin client interface.
When you login to the database, you have access to the Backup plan entry, under Job automation in the left navigation tree. The Add Backup Plan and Auto Backup Logs menus are available when you right-click on Backup plan:
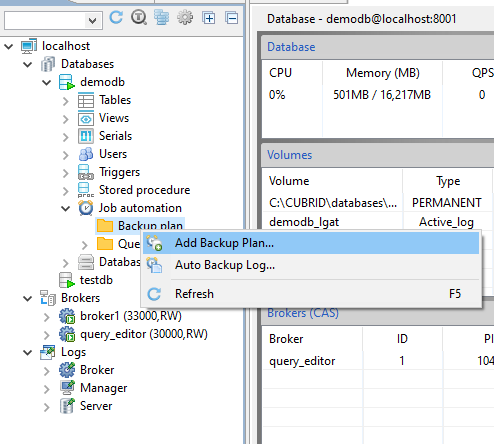
If you want to activate a backup periodically, you will have to configure it, using the Add Backup Plan option:

Note: A backup automation is executed only when the CUBRID Manager server is running.
And there is more to discover, so we encourage you to try using all the backup options provided by the CUBRID Admin client, to learn the most effective way to implement a successful backup strategy.
This concludes the 1st part of the CUBRID Backup & Restore tutorial, focused on presenting the CUBRID backup features.
Please access the 2nd part of the tutorial to learn about the restore capabilities built into CUBRID.
Thank you!
 CUBRID Backup & Restore – Part II (Restore)
 Common Uses of CUBRID Node.js API with Examples


